Welcome!

Do you have APA formatting questions? Thesis statements got you down? Need to study grammar? Need some help with critical thinking? Having trouble with literary analysis or research? Want to take a look at some example essays? Well, I probably have a post here somewhere that can help you. Please use "Search This Blog," the "Labels," or my "Blog Archive" to help you find what you need. Have questions about what you find? Please feel free to comment or ask questions. I do moderate comments, and I try to respond to all topical questions and comments in a timely manner.
Showing posts with label Products and Product Reviews. Show all posts

Monday, July 29, 2019

The College Journal: Supplies on a Student Budget

Purchasing supplies on a student budget can be as simple as buying a mechanical pencil and some felt tip pens
The College Journal is Available on Amazon through This Affiliate Link

The College Journal is a one-stop-shop for all the types of journal pages a college student might need during a semester. It's divided into three areas: Academic Calendar, Weekly Reviews, and Dailies. Each area is already set-up with easy-to-use templates. Prompts for the templates appear in the Introduction, and additional prompts and ideas appear online - on this very blog, as a matter of fact!


What Supplies Do I Need to Start a Journal?

So, what else do you need to get The College Journal started? Depending on your budget, you can start minimal, something as simple as a mechanical pencil, or you might jump right into being artsy and buy yourself some laser-cut stencils and water colors. Of course, there are lots of options in-between.

Something That Writes (and Maybe Erases)

I would recommend starting with something that writes and erases. Lots of people jump right in with an ink pen, but sometimes mistakes happen, and being able to erase the mistakes and start over can lower any stress or anxiety you have about what you write or draw. Try a refillable mechanical pencil, which prevents the need for a pencil sharpener. This Pentel mechanical pencil comes with extra lead and an eraser.

If you're not terribly stressed about what you write and can accept that mistakes happen, try a black or blue gel pen, or give Micron pens a try. If you're environmentally conscientious, try a fountain pen or a roller ball with replaceable cartridges. Try a few pens before you buy too many, however. You want to avoid pens that bleed through the pages.

Add Some Color

If you want to add a little color to your journal, I recommend felt tip pens or colored pencils. These can either be used to add emphasis to your pencil-written work, or you can write with them as a way to organize your thoughts. Paper Mate Flair pens do not bleed through paper, and I can attest to it since I've been grading papers with them for several years. Crayola Twistables Colored Pencils, just like mechanical pencils, do not require a pencil sharpener, so they're easier to take with you and use if you like colored pencils. 

Another way to add color is with washi tape, stickers, or rubber stamps. There are a variety available in big box stores, office supply chains, and online.

and speaking of on line . . .

Making Lines

Last, but not least, you want to be able to add lines to your journal, especially when you're completing your pie graphs.


You can add a bookmark that can also double as a straightedge: Something as simple as an index card might work for you. You can also purchase a set of metal bookmark stencils or even use a protractor, especially if you want to carefully divide your pie graphs as exactingly as possible.

Whatever the additional benefits of keeping a journal, one of the most important and often overlooked is as an avenue for self expression. Whether you want to show off your abilities in a minimalist fashion or by using bright and colorful images and fancy lettering, it's your journal to do with as you see fit. There are supplies to match every budget and every personality.


Copyright Amy Lynn Hess. Please contact the author for permission to republish.


Wednesday, June 19, 2019

A Newbie's Cro-Tatting, Needle Tatting, and Shuttle Tatting Comparison

Tatting is a type of lace making, and there are three ways to go about creating tatted lace: shuttle tatting, needle tatting, and cro-tatting, which is a crossover between crocheting and tatting. 


When I was new to tatting, I found it very helpful to learn all three methods in order to better understand each one and the differences between them.  The samples in the title image are my own "newbie" samples.

One of the biggest differences I have found is in the tightness or "thickness" of my completed projects. In shuttle tatting, the double stitches used in tatting are built onto the thread itself, so the stitches are as tight or as small as the thread. In needle tatting the stitches are built onto the needle, which holds the thread in its eye, and therefore two thicknesses of thread are pulled through the rings when the rings are closed, or through the chain when the chain is made. If I make the stitches too tight, I have a very difficult time pulling the needle, the core thread, and the tail thread through the double stitches. Cro-tatting is similar to needle tatting in that two thicknesses, or a doubled length of thread, is pulled through the ring after the stitches are built onto the cro-tatting hook, and in order to close a ring the hook has to be wiggled through the double stitches. For that, the larger and more consistent the double stitches the better! I have also found that even the smallest cro-tatting hook I can find and easily use is fairly large compared to a tatting needle. The thicknesses of the completed projects, therefore, can be very different - especially for newbies who need a little extra "wiggle" room.

Other differences, like speed and ease, are entirely subjective, and for every person who prefers shuttle tatting, like Karen Cabrera, there is a person who prefers needle tatting, like RustiKate, and both can be done with speed. When I want to try something quickly, I opt for needle tatting. Yet, as someone who has crocheted for over 30 years, I generally reach for my cro-tatting hook when I start a new project, but I carry my shuttle tatting in my purse because it easily fits into an old Altoids tin. With my cro-tatting hook and tatting needles, which are fairly long, I would worry about breaking them if I carried them with me too often.

There are other subtle differences that make different forms of tatting more difficult at given times. With needle tatting, for example, I need to make sure I have a needle threader handy and know how much tail thread to leave. With shuttle tatting I need to make sure I know whether I need one shuttle or two, attached to the ball or not, and with cro-tatting I have to know that my crochet chain, versus double stitches, will not change the look of the pattern too much for my personal aesthetic.

The price of the tools is also quite similar among the three methods. There are several options available for all three. The Handworks from the Heart blog has an excellent post about cro-tatting hooks. I most often use my Annie's brand cro-tatting hook, and I also use a Prym brand hook on occasion because it is a bit smaller.  When I work with yarn I use a Tunisian crochet hook for cro-tatting.  My favorite tatting shuttles (Affiliate Link) with bobbins are made by Susan Bates, but I also really like my small Clover shuttles without bobbins. Handy Hands has a great set of tatting needles for a variety of thread sizes (that also comes with threaders and a small instruction booklet), and I have found that simply having that one set is enough for me.

So what does this all mean? What is my recommendation? Because the cost is minimal, and the feeling of accomplishment in trying all three is high, I recommend trying all three and seeing which works best for you in any given situation or with any given pattern. Personally, I enjoy all three for different reasons and am exceptionally glad I've given all three a try!

Want to read more about Arts and Crafts? Try


Cro-tatting Rows of Rings: Split Rings and Stacked Rings
Punch Needle Embroidery Supplies for Beginners
Which Weaving Loom is Best for Beginners?


Copyright Amy Lynn Hess. Please contact the author for permission to republish.


Thursday, December 20, 2018

Pen and Ink: Inspired to Draw with Sticks

Four sticks have been prepared for drawing with Pelikan ink.
Prepping sticks for drawing requires minimal effort

The mark of a clever art book is that it inspires readers to make some marks of their own. 


James Hobbs's book, Pen and Ink: Contemporary Artists, Timeless Techniques (affiliate link), inspired me to make a few marks.

Specifically, I was inspired to learn more about drawing with sticks, just plain ol' dirty sticks, of which I have an abundance.

Drawing with Twigs: Ch'ng Kiah Kiean

The image from the book that truly inspired me was an ink drawing of Ng Fook Thonk Temple by Ch'ng Kiah Kiean, and there are additional twig drawings in the book by the same artist. The fine lines and detail of the drawings belie the artist's humble tools, dried twigs. Yet there's personality and interest in the drawings that would not be there had Kiah Kiean used commercial pens, which create a more consistent line.

Preparing Sticks for Drawing

Googling "drawing with sticks" provided me with two videos that both showed how to draw with sticks, one that demonstrated how to whittle a tip and another that showed almost the same results with an unchanged tip. It seemed easy enough after that, almost "anything goes." I chose a variety of sticks from my yard; some oak, some cedar, and even some trumpet vine, and I pulled out my woodworking tools. In this instance, I used pruning shears, a fine sanding block, and a box cutter.

A variety of sticks can create a variety of line thicknesses and qualities
I used the pruning shears to clean up the tips of the twigs and the box cutter to make sharper points and flat tips. I used the sanding block to create more consistent surfaces.

An Experiment in Drawing with Sticks

To test my twigs I used a watercolor paper and a royal blue Pelican ink. I did try watering the ink a bit, but it created a bleed I did not really like, especially when using the trumpet vine. Using the trumpet vine created quite a "blobby" line, but it worked well as a "brush." On the other hand, the cedar, especially the small cedar twig, worked beautifully, as did the oak twig with the sanded tip.  As expected, the cedar twig I split created a lovely double line. Using the cedar and oak sticks made my handwriting extra lovely, and as an added bonus, I don't have to clean my pens at the end of my session.

With materials at hand, including a brand new "art supply" from my yard, I was able to follow up on an inspiring inclusion in Hobbs's book. The experiment was a complete success, and I look forward to hearing about your endeavors in the comments.

Want to read more about no fuss art projects and supplies?  Try
Adult Coloring Books
How to use Beautiful Buttons
Point of View and Emotion

Copyright Amy Lynn Hess. Please contact the author for permission to republish.


Friday, June 29, 2018

Make-up: Carmindize or Contour?

Are you living in a 3-dimensional world?

Does anyone remember Carmindy from What Not to Wear? She always exuded an easy-peasy confidence and an easy-breezy style. This translated, too, to the way she taught her makeover guests how to do their faces. Emphasizing what made a guest already beautiful was her thing.


Get Carmindized with the 5 Minute Face


I was so completely impressed with her and her "5 Minute Face" that I practiced it until I perfected it and could list all my favorite products and their shade numbers by using only one hand. When and if I received a compliment on my makeup, I proudly told the complimenter that I "Carmindized."

Fast forward five years, since the show went off the air, and I haven't worn makeup but a few times in all those years. I've been sick, really sick, and it just wasn't something I had the energy or inclination to do. Now that I'm feeling better and interested in wearing a little makeup, again, I'm absolutely horrified by new makeup trends. They're scary, created by celebrities I don't respect very much, and complicated. More than that, though, these new trends mimic a troubling trend in the way people think about their own faces and their own lives.

Contouring 2-Dimensional Faces

Why do women demonstrating makeup on YouTube look dirty, like an online army of  Mary Poppinses and their sooty rooftop compacts? Some of them look green, some purple, and most look startlingly grey. Yes, I've heard of contouring, and I'm good at it because I was trained in stage makeup and did an A+ Mad Hatter and an extreme aging sample for my final exam. It's not something I would wear to the local Mexican restaurant for enchiladas rancheras and a side of guacamole, however. What about when people look at the side of such a face from as close as the next table instead of the fourth row of a theatre? Dirt: It looks like dirt. In real life we don't just get frontal views of one another, but this look wasn't really meant for real life or anything other than frontal views, was it? I don't think it ever was.

In an age where each second of each minute of each hour of each day is captured by photographic evidence, people are thinking about faces in a frontal photographic way. They are thinking of themselves in two dimensions. Today's makeup is photographic makeup sans a lighting designer, talking head video makeup, social media makeup, character makeup - albeit not quite as extreme as the Mad Hatter. It's makeup for people hitting the clubs and taking duck-face Instagram images. It's not the easy-breezy "5 Minute Face" we saw practiced from 2003 to 2013 on TLC. It's not even about getting out into the world and being true to oneself, which is what Carmindy constantly emphasized. Is that advice to be oneself really that outdated?

We Live in a 3-Dimensional World

Give me back my "5 Minute Face," my naturally dimensional face, please.  Being a naturally multidimensional person and putting on a face that shows others I want to be in the world, the real world, is so much more my style than putting on a face that's meant only for living a series of two-dimensional photo ops.

Want to read more? Try 

Stitch Fix Review: Styling at 40
Product Review: MICA Beauty Cosmetics Vita-C Exfoliating Peeling Gel
Hair Accessories to Finish a Professional Hairstyle


Copyright Amy Lynn Hess. Please contact the author for permission to republish.


Tuesday, May 1, 2018

Punch Needle Embroidery Supplies for Beginners

Embroidery punch needle and supplies
The Boye "I Taught Myself to Punch Needle" is a great value kit for getting started with needle punching!

Needle Punch Embroidery

Needle punch embroidery is a type of embroidery that mimics the look of a hooked or punched rug.  The main tool to use is a punch needle, a hollow needle that allows thread, floss, or fine yarn to pass through and leave a loop on the opposing side of the fabric, usually weaver's cloth (affiliate link) or a 14 or 18 count Aida.  As for a frame or hoop, it's essential for punch needle projects to use a locking or no-slip hoop (affiliate link) or frame - the fabric needs to remain drum tight as it's punched. Lastly, some people prefer to use a design or pattern that comes with the necessary fabric and floss. There are an overwhelming number of choices for supplies online, and the punch needles sold online range in price from about $3.00 to $20.00. Most come with the extra long threader needed to thread the needle.  It's hard to tell when shopping online, though, exactly which needle to buy, and putting together a beginner's kit can be a bit confusing.

Because I already crochet and have several balls of Aunt Lydia's #10 crochet cotton, I wanted to start with a needle and fabric that would accommodate the size of my crochet cotton. In order to really see the sizes of the needles and fabrics, I needed to go to a real store.  In my area there are three options for craft supplies: Michael's, Hobby Lobby, and Walmart.


Michael's Dimensions Punch Needle

The punch needle available at Michael's is the Dimensions needle, which is not adjustable, nor does it have interchangeable needles.  I did not purchase this needle, but if you'd like something simple and inexpensive, these Dimensions punch needles are also available on Amazon (affiliate link).  It is inexpensive, but it does not come with all the supplies needed to get started. A no-slip hoop, fabric, and floss, thread, or yarn, will still need to be purchased.

Hobby Lobby Artiste Punch Needle

The Artiste punch needle available at Hobby Lobby is adjustable and has interchangeable needles. At $16.00 (with tax), it is a few dollars less expensive than the Ultra punch needle, one of the best selling and most highly rated needle punches sold online. Like the Ultra, it comes with various sizes of needles, small, medium, and large, that can accommodate up to 6 strands of embroidery floss, fingering yarn, or crochet cotton.  Again, however, this needle does not come with the other supplies necessary to get started: It does not even come with instructions, so if you opt for this needle, be prepared to  find instructional videos and documents online.

Walmart's Boye Punch Needle Kit 

The Boye "I Taught Myself to Punch Needle Kit" (affiliate link) comes with not only the punch needle, but the locking hoop, patterns, and an instructional booklet with ideas for projects. I picked mine up for around $10.00, and picked up some embroidery floss and 14-count Aida fabric while I was there.  With the locking hoop that came in the kit, I was able to get stared on a project right away without the frustration of a loose project. Although this particular Boye kit comes with only one size needle (2 mm, the equivalent size to the large needle on the Artiste punch needle), I was able to easily use my crochet cotton and 6 strands of embroidery floss on the 14-count Aida. If I want to add to my needle sizes in the future, Boye also sells a needle kit that comes with three needle sizes.

Beginner's Punch Needle Shopping List

To review, in order to get started with needle punch, you will need a few special tools.

  • A punch needle
  • Weaver's cloth or 14 or 18-count Aida
  • A no-slip hoop
  • Thread, floss, or cotton, depending on your chosen needle size
  • A pattern kit or a healthy imagination


My recommendation is to start with the Boye "I Taught Myself to Punch Needle Kit," which will get you an inexpensive starter's kit that can easily be added to in the future.

Want to read more product reviews? Try

Needle Felted Alpaca Kit
Which Weaving Loom is Best for Beginners?
Are Adult Coloring Books Worth the Money?


Copyright Amy Lynn Hess. Please contact the author for permission to republish.


Wednesday, October 11, 2017

Needle Felted Alpaca Kit Product Review

Make a Needle Felted Alpaca!

Needle felting has gained enough popularity in recent years to have encouraged craft supply companies to create easy-to-complete kits. Dimensions kits, available online and in craft supply stores, has several kits available, including kits for making animals in molds or without molds.


Included Needle Felting Supplies

The alpaca kit by Dimensions comes with everything a crafter needs to create a finished felted animal without a mold. I chose this kit because of its reasonable price and because the supplies were all included.  I was able to get started without worrying about whether or not I had purchased all the right supplies or the right amount of wool: The kit includes just the right amount of wool, a felting needle, a small piece of dense felting foam, an embroidery needle and floss, and basic instructions with measurements.

Basic Instructions Included

Needle Felting Measurements
As a complete beginner, I was able to successfully complete the project in about four hours.  I found the instructions sufficient for making the alpaca, but I did read a few "basics of needle felting" posts online after starting.  I recommend anyone starting any kit read ahead before beginning a sculpture. Some of the great tips I learned could have helped me ensure my centers were well felted and I was using my needle properly, pushing it into the sculpture far enough to use all of the barbs on the needle; slowly, but surely, wins the race when needle felting.

One excellent benefit of the instructional sheet was the included measurement charts. I was able to compare my shapes to the 1:1 shapes in the instructions to be sure I was on the right track.

Dimensions Needle Felting Kit Pitfalls

The most difficult part of the process was making and attaching the ears for the alpaca. A very small amount of wool has to be folded into shape and felted for quite some time.  Because the ears are flat and the foam is dense, I was not able to take advantage of all the barbs on the needle as was recommended. Honestly, the ears seemed to take forever, but I persevered . . . after a long break and some more online reading about how to make ears.

The Finished Felted Alpaca
Most importantly,  I only stabbed myself with the felting needle once.  However, because of the danger involved (I did bleed copiously), I would not recommend this project for a child unless the child wears finger protectors of some sort. As a matter of fact, because I enjoyed this project so much and plan to do more needle felting, my next order from Amazon will include a needle felting tool kit that includes finger protectors, a nicer felting mat, and additional felting needles of various sizes. Having these tools ahead of time may have made my project go a bit more smoothly, but I still had an excellent, successful afternoon with this kit, and in the end I made a brand new felted friend.

Want to read more about arts and crafts? Try


Monday, May 9, 2016

Which Weaving Loom is Best for Beginners?

The Prima Fiber Arts Weaving Loom Kit, The Home Made Modern Kit, and a Cardboard Loom
Frame Weaving Looms Are Great for Beginners

There are many types of weaving looms, all with varying degrees of mechanical complexity. From rigid heddles and cards to treadles, pins, bobbins, and dobbies, there are a multitude of ways to work a warp, weft, and weave.  By far, however, the best weaving loom for beginners is the simple frame hand loom.


Although there are some variations even among the different types of hand looms, most are made up of a frame on which warp threads can be wound, and . . . well, that's it. Even a square of cardboard can be used as simple hand loom. There are many commercial looms to choose from, as well, all of different prices and quality.

The beginner's  weaving loom I've found to be of the greatest value is the Prima Fiber Arts Loom kit. However, I also paid half the price for a simple loom from Target, on which I made one of my favorite wall hangings. When in doubt, there are also several ways to make a loom for yourself!

Prima Fiber Arts Loom Kit Review: Special and Substantive 

The Prima Fiber Arts Loom kit came with everything I needed to create a wall hanging, minus scissors: the loom, a shuttle, the shed, a large tapestry needle, a weaving comb, and instruction manual.  The kit even came with all of the yarns and bits and bobs needed to create a piece "right out of the box." All of the hardware needed to hold the loom together was present and accounted for.

The adjustable loom and wooden tools are all made with high-quality materials, and  I am especially pleased with the weaving comb and wooden tapestry needle and shuttle.  They feel substantial when held in the hand, more like "real" tools than toys.  Additionally, the loom is decorated with flower "doodles," which adds to the feeling of its specialness.

I do have two reservations about this loom kit, however.  First, I did have to sand the tools before I could use them.  Although the loom is made with quality materials, I feel as though the workmanship is a bit shoddy.  There were splinters and rough edges on the tools when they arrived.  Second, the warp thread that is included is very slippery and shiny.  Although it looks lovely, I would never recommend this slippery thread for a beginner's project.  It makes it very difficult for knots to hold and for the project to be tight.  Of course, a different thread or yarn can easily be substituted.

Hand Made Modern Tabletop Loom Review: Lightweight and Simple

The Hand Made Modern Tabletop Loom came with almost everything I needed to create a wall hanging, minus scissors: the loom, a shed, three shuttles, an instructional flyer, and a traditional (metal) tapestry needle.  It also came with a cotton thread to use as a warp thread.  However, the loom is made with much lower quality materials, and it feels more like a toy than a "real" tool.  The loom is held together with the tension of the warp, not with hardware.  Because the shed is a bit wimpy, it did flip on me a few times during my project.

On the other hand, the cotton thread was much easier to work with, and the loom is much lighter, making it easier to hold to work or to pack up and take away from home.  Furthermore, although I love the wooden tapestry needle that came with the Prima kit, a traditional tapestry needle is very useful in a tight spot.

Homemade Loom Review: Free and Portable

There are several Pinterest Pins about making and using handmade looms, from using copper pipe and fittings, to using dowel rods, to picture frames and finishing nails, to scraps of cardboard and cardboard boxes.  Although I opted for the simplest-looking handmade loom made of a square of cardboard, I was not successful in making a cardboard loom with a straight warp.  However, I was able to make a crooked little weaving.

The best part of the cardboard loom was that is was free, and it was a creative way to spend an afternoon; not only in the weaving, but in the making of the loom.  As for being portable, the cardboard loom also wins by a longshot.

Ratings

The important thing to remember when choosing a beginner's loom is the beginner's preferences and needs. Portability, quality, weight, and price are always worth considering.  Starting a hobby with lower quality materials can sometimes work out, but more often than not, the wrong tools will stymie the user's desire to continue. I would recommend choosing the sturdiest loom your budget will allow.


Want to read more about fiber arts or arts and crafts? Try

Make a Celtic Tatting Shuttle
Learn to Crochet for Stress Relief
Are Adult Coloring Books Worth the Money?


Copyright Amy Lynn Hess.  Please contact the author for permission to republish.


Monday, April 25, 2016

Stitch Fix Review: Styling at 40


If having a personal clothing stylist sounds good to you, give it a try!  

What is Stitch Fix?


For those who haven't yet heard about it, Stich Fix is a subscription-based clothing stylist service. A Stitch Fix clothing stylist chooses and sends clothing back to a subscriber based on her given online profile.  The subscriber can pay for the items she receives that she likes.  She sends back, at no cost, the items she doesn't like, letting the stylist know which items she likes or dislikes, and why.  Those notes back to the stylist help each Stitch Fix order get a little closer to perfection.

Why I Tried Stitch Fix


Because I've been a bit frumpy lately (more on that later), like for the past several years, my gift to myself for my 40th birthday was a commitment to a monthly Stitch Fix. It's a little outside my comfort zone to spend much money on clothing, but after so many years of thrifting, I think it's time. I'm also a little nervous about letting someone who doesn't know me very well pick out my clothes, but I think it's time for that, too.  I think.

What I've Noticed about Stitch Fix


1. There is an opportunity for the stylist to get to know me, and I get to know me.


In addition to creating the initial profile on the Stitch Fix site, a subscriber can also choose to share with the stylist other social media clues, like a Linkedin profile and Pinterest boards. Although it's optional for subscribers, I did take advantage of sharing my social media accounts for Pinterest and LinkedIn.  I made notes, both positive and negative, on the Pinterest items I added to my board called "Stitch Fix." Additionally, I created clothing sets using Polyvore, and I shared those to my "Stitch Fix" board, too.  This helped me learn what styles I really like, what might look good on my frame, and the kinds of things I should look for when I do venture out to go shopping.

Subsequently, I became overly obsessed with Pinterest and with how I dress.  I know it was "overly" because I was thinking about clothing instead of paying attention to the real people around me. This realization made me remember why I got frumpy in the first place: Frumpy is comfy, and the best way to chill out around the people who surround me is in comfy clothes that I don't have to worry about adjusting or maintaining.  I also like clothes that make me look thin, but I will settle for clothes that do not make me look pregnant.

2. The first "Fix" is usually "blah."


I read the observation on several other reviews that the first batch of items the stylist sends is generally not perfect.  I would suspect this is because the stylist hasn't gotten to know a subscriber very well by the time a first fix is sent out.  This was definitely true for me, as well.  I felt as through the stylist had perhaps not looked at the copious postings I had made to Pinterest or hadn't really read my initial notes, or perhaps that I was too old to be using the service: For example, I specifically stated how much I hate stretch denim or low-cut pants, and the first thing I pulled out of the box was a pair of super-stretchy, distressed, low cut jeans that were very short on me.  I returned everything with friendly notes, and I am going to try one more time.

That said, when I shared what had been sent with my husband, he immediately recognized that the items were in no way something I would generally wear, and he noted that maybe the clothes the stylists have to choose from aren't even in the wheelhouse of my likes or personality.  That got me thinking about my "likes and personality," and even how the people who know me best think of how I dress; not strangers, but the people who know me best (and love me anyway).  In other words, if I were an "Apples to Apples" noun card, on which adjective would I get played?  Would it be on frumpy or something else?

3. Shopping got easier.


As I mentioned in point #1, the time I spent obsessing over Pinterest pins about women's fashion made shopping a lot easier.  I knew the sorts of things I wanted to look for when I stepped into the Goodwill and Value Village thrift stores; that's right, the thrift stores.  What did I take home from said thrift stores?  The same kinds of clothes I've been wearing for 40 years: one pair of long, wide-leg denim trousers (non-stretch, Ralph Lauren), one short sleeve, vintage western-cut shirt from the men's department (with pink, pillow-ticking type stripes), and a bright, heather blue cardigan. It was easy to find these items because I had been thinking about what I like, and it was easy to walk out with them because I had donated two boxes of clothes I no longer was wearing.  Most of those donated clothes had been purchased at the same two thrift stores.  A rotating wardrobe!

Final Thoughts on Stitch Fix


So, if shopping got easier, and signing up for Stitch Fix only got me obsessing about clothes and a failed first fix, "why," you might ask, am I trying again (as stated in point #2)?  I'm going to give the service another try because I think there's more to learn about myself, and I might get some neat clothes out of the deal, really.  After all, when I went shopping, I left with the same things I've been wearing for 40 years, for Pete's sake.  I think it's time to try something new.  I think.

Scratch That Last - Addendum Regarding the Second "Fix"

I've now received and returned every item in my second "fix."  Although I clearly stated in my notes back from the last box that I will not wear stretch denim, I do not want hand wash or dry clean only clothes, and I prefer natural fabrics and materials, I received hand wash Rayon tops, skinny jeans, and some cheaply made earrings.  To be fair, it's a different stylist, and she made it clear she looked at my Pins, so she was trying.  Also, a few minutes after I left the Stitch Fix Web site, I received an email letting me know that since the first two boxes were not to my liking, the third styling fee would be waived for me if I tried one more time.  There were additional questions for me to answer about my preferred silhouette and styles.  I think it's a wonderful marketing and customer service advantage, so I answered the questions and agreed to one more go. I'm fairly certain the third time will not be a charm, but I will try.

In the meantime, does anyone have any recommendations for a Stitch Fix alternative?  Please share in the comments!


Want to read more about my complicated relationship with my clothes?  Try

Project 333 Math: Making My Own Rules  


Copyright Amy Lynn Hess.  Contact the author for permission to republish.

Thursday, March 10, 2016

Product Review: 2015 Chevrolet Equinox

Is your Equinox evil?  I think mine might be.

I drove over to a big Jim Ellis dealership in Atlanta a few weeks ago and purchased a used 2015 Chevy Equinox.


Unfortunately, I hate it. This car rates a "D," at best.


The things that are important to me in a car are stability, usability, enjoyment, and safety.  Here's how the 2015 Chevrolet Equinox rates in my book.

Stability

This car drives like a rollerskate.  To be fair, not everyone agrees with me and my trade-in was a 6 cylinder Jeep Liberty with great pick-up and excellent power steering and stability, so to compare may not be entirely fair.  However, with the Equinox's stability and traction control features, I expected a lot more control.  It drifts to the right, bumps in the road send me bouncing all over my lane, and I constantly feel like I have to have a death grip on the steering wheel because the wheel doesn't seem to straighten back out very quickly after a turn.  When I returned to ask about maybe getting a different car, the dealership suggested their service department fix the air pressure in the tires (since they hadn't done that very basic thing before I bought the car).  It still drives like a rollerskate.

Luckily, a very nice salesman over at Heyward Allen Auto in Athens suggested an alignment.  I appreciate his advice and will try that, next.

Usability

I asked for a trailer hitch and a rubber mat for the storage area, but I guess that was too much to ask because those things don't seem to exist in Atlanta unless the buyer coughs up another several hundred dollars. AWD, apparently, is also not available.  In other words, the three features that would make this car the most usable for me were unavailable.  I like to work in my yard, and my yard needs a lot of work, so having a way to haul supplies and equipment when necessary is important to me.  I also intend on driving north, which means snow.  I guess I will just keep my fingers crossed.

By the by, if anyone can sell me a Canyon with 24,000 or so miles on it, I'd be interested.

Enjoyment

All in all, the sound of the tarp shifting and shaking in the back in lieu of the rubber mat won't be as bad as the sound of the dashboard rattling when the car is in Economy mode.  Not that the rattling bothers the voice controls that are supposed to be so "enjoyable."  The car can't understand what I'm saying, regardless.  The only response I can get when I speak is that there is too much background noise.  The most annoying thing about this car is that I cannot wear my hair up, which I do every day, because the headrest juts so far forward it pushes my head and bumps my ponytail or bun as I drive. Much like a child on an airplane, it's trying to see how far it can go before I toss it out the window.

On the other hand, I did get a few free months of XM, so I can listen to Bluegrass Junction to my heart's content.  Furthermore, once in a while Siri can understand me, so I can make calls when she is in the mood.  Lastly, I get great enjoyment out of being able to see my average and best gas mileage on my dashboard and the variations in my tire pressure.  My current average is 28 MPG.  My current tire pressure is 34, 37, 36, and 38.

Safety

Most importantly, this car's score is saved by its safety features.  It has lots of airbags to offset the multitude of blind spots, OnStar services, and seatbelts that cut into my neck and armpit areas.

Other than that, I have smacked my head twice while putting things in the backseat, and I have smacked my knees and shins each time I have gotten in or out of the passenger seat.  Lastly, the MyLink screen shines in my face at all times, and from what I can tell, there is no way to turn it off. Please, if you know how to turn it off, please tell me.  This car didn't come with a manual, and this screen is extremely distracting when it's dark outside, which is 50% of the time  I am driving.


Final Score

Don't get me wrong, it's my own fault I bought this car (in too much of a hurry, apparently) and not the car I tested while I was in Michigan. I also think it worth noting that the salesman at Jim Ellis who sold me the car was very nice and very personable.  In the end, I just really hate this car and needed to take a moment to vent my spleen.  As it stands, I am stuck with this car until a tree crushes it (while no one is in the car), or until I can find something reasonably priced to trade.


Copyright 2016 by Amy Lynn Hess, resentful owner of a P.O.S. Equinox.


Monday, December 28, 2015

Product Review: Are Adult Coloring Books Worth the Money?

A pencil-colored owl with decorative acorns and greenery
An Owl from the Enchanted Forest Adult Coloring Book

Although I had the inclination to get myself an adult coloring book as soon as I saw them hit the shelves, I stubbornly passed them by, thinking "If I want to color I can just draw a picture, right?" 


I continued to see them at the craft stores, at the big box stores, at the grocery stores, and at my in-laws, even!

The next time I saw them, I was weak. I purchased Johanna Basford's Enchanted Forest: An Inky Quest and Coloring Book.  It's right up my alley with its forest and castle theme.

The Pros

To begin, I am happy I purchased this book.  First and foremost, the book is quite beautiful to flip through, whether or not I'm choosing a page to color in it. The pictures are expertly drawn, featuring both elements of design in entire scenes and the repetition of patterns.  Furthermore, the act of coloring in this book has its intended effect; I have spent a few hours coloring in it, and it feels very much like a meditative practice.  Coloring in it effectively helps me clear my mind and gives me something stress free to pass a little time between other tasks.  On a more personal note, coloring in it also gives me a chance to use my fairly large collection of Prismacolor colored pencils, especially the numerous shades of green I've accumulated.

The Cons

On the other hand, despite my overall "gladness" of having purchased this text, I recognize it may not be for everyone.  For example, the detailed drawings might be a bit off-putting to some folks who may have shakier hands, poor eyesight, or who lack a decent pencil sharpener or tabletop workspace. In that case, a book with less detailed drawings may be better.  I do find myself leaning close and stopping to sharpen my pencils fairly often.  I also recognize that although I already had several pencils, others may not be so prepared; starting a collection of colored pencils adds to the expense of the coloring. All in all, however, the overall cost is quite low when compared to other artistic hobbies.

Final Assessment

Because of the low cost of this hobby and the beauty of the book (whether or not you color in it), I recommend it to anyone who may be on the fence.  If you remember fondly your days of coloring as a child, pick it up and give it a chance to work its magic, again.


Want to read more about arts and crafts?  Try

How to Use Beautiful Buttons
Yarn as Memory and Memory as a Gift
Arts and Crafts and Healing


Copyright Amy Lynn Hess.  Please contact the author for permission to republish.

Wednesday, September 9, 2015

Airlock Lids and Homemade Sauerkraut

Use 1 1/2 Tablespoons of Salt for 1 Medium Head of Cabbage

I recently decided to try making homemade sauerkraut for the first time.  


After reading a bit about the process and making my intentions known, my husband asked if I was going to bury it in the backyard.

Although it is a bit "from the old country" of me to make my own sauerkraut, I didn't need to go that "old country."


Making Sauerkraut


I was able to make safe, delicious, just-the-right-amount sauerkraut using 3-piece airlock fermentation lids (affiliate link) sold by Quality Reliable Products.

I started by

  1. chopping a medium head of cabbage into small bits, 
  2. stirring it by hand in a large mixing bowl with 1 1/2 tablespoons of sea salt until it got juicy, then 
  3. packing it down into 2 large-mouth mason jars using a small jelly jar and a wooden spoon.

Using Fermentation Lids


After that came the super easy part, which did not include burying anything in the backyard.  

The next steps included 
  1. screwing down the airlock lids, 
  2. slowly twisting the airlocks into the holes in the lids, then 
  3. carefully filling the airlocks half full of water so that none of the water got into the jars and lastly, 
  4. fitting the lids onto the airlocks and placing the jars in a safe storage area for about 4 weeks.

More About Sauerkraut


Now, according to this very thorough sauerkraut-making post by Lea from Nourishing Treasures and posted on the Food Renegade blog by 


What to Eat While Fighting Lyme Disease - Detox Soup
Mizeria: Dairy-Free Cucumber Salad

Monday, March 2, 2015

A Budget Day Trip to Chateau Elan's Winery

There are many ways to occupy a day away from the city at Chateau Elan.

The winery at Chateau Elan in Braselton, Georgia, is an inexpensive and easy day trip from the Atlanta metro area.


On a visit this past Independence Day, we spent three hours at Chateau Elan, mostly just at the winery, which included a self-guided tour, a few sips at the tasting bar, and a walk through the art gallery, gift shop, and grounds. Meeting a challenge we had set for ourselves to spend less than $25.00, the entire day at the winery cost a grand total of only $5.00.

A Short Trip from Atlanta, Georgia

Having never been to Braselton, I was very impressed with the signage on I-85, Highway 211, and on the grounds. There was no confusion about where to turn or where to park. The winery is a very close walk from the parking area, and the walk is very beautiful.  The grounds are planted with well-manicured lawns and gardens.

Our first stop was the hotel, where we enjoyed the indoor fountains, sky lights, and many comfortable seating areas. From there we headed out to the winery and grounds.

Welcoming visitors walking to the winery from the hotel, there is a magnificent fountain with a statue of a woman stomping grapes; she makes a great photo companion.

Surrounding the winery are acres of grapevines, a path leading to the nature trail, and a view of the equestrian center. The final touch a visitor cannot help noticing before entering the winery is the large, primitive clay vessels standing at the entrance.

Inside the Chateau Elan Winery

Once we entered the winery, there were several options for what we could do first. We chose to wander through the gift area and take a look at the varieties of wine available. We also took a peek into The Culinary Studio, which is advertised on the winery brochure as a "teaching kitchen" where they offer classes, demonstrations, and events.

Although guided tours are offered during the week at 11:00 a.m. and 3:00 p.m., we chose to take a self-guided tour instead of waiting for the 3:00 tour to begin. The employees were very helpful getting us started, and there are placards within the winemaking area to help explain the winemaking process.

Unfortunately, we were there pre-harvest, and there were no grapes in process that day. We completed our tour with a stop at the tasting bar, where for $5.00 we tried five varieties of both red and white Muscadine wines.

Closing Out the Vineyard Trip

After our tour of the winemaking area, we also stepped into the upstairs art gallery, which includes artwork turned wine-labels, and rested our slightly light-headed selves on a lovely leather bench while it began to rain lightly outdoors. Feeling slightly spontaneous as well as slightly light-headed, we decided to forego bicycle rental and instead walked through the vineyard back to our car in spite of the rain.

Our Independence Day was a very lovely first trip to Chateau Elan's winery, and we are planning a return trip in the fall. The trip to Braselton from Atlanta was effortless, there was plenty to see and do both indoors and outdoors, and the wine was fantastic! I'm looking forward to eating at one or more of the many restaurants, taking a cooking class, taking a guided tour of the winery post-harvest, perhaps seeing a horse show, staying overnight to enjoy the spa and swimming pool, and definitely tasting a few more of those Muscadine wines.


Copyright Amy Lynn Hess. Contact the author to obtain permission for republication.  Originally published July 8, 2011. 

Tuesday, October 21, 2014

Product Review: All-n-One Knitting Loom


 Knitting looms are hot ticket items for Christmas this year. Take a look around and they seem to be everywhere, from craft stores and big box stores to grocery stores and dollar stores!  These looms come in sets, or singles, for a wide array of price points.  They're round, long, spiral, small, hand held, big, brightly colored, pale, adjustable, "sock" loom size, bulky weight gauge, light gauge, double knit, single knit, plastic, wood, and even metal.  Holy mackerel! It's a lot to consider, isn't it?

I was a bit perplexed by the choices, myself, so I emailed the nice folks at Authentic Knitting Board and asked them if they had a product that would solve my particular problem: I didn't like the toy-like plastic sets that allow for only bulky or double-strand knitting.

To paraphrase, they said, "Never fear!  The All-n-One is here!"

Authentic Knitting Board's All-n-One Loom does just about everything I want to be able to do on a knitting board or round loom. It's a knitting board, round loom, and sock loom in one. It can also be used with a variety of yarn weights, which gives finished projects the coveted look of needle knitted items.

Why the All-n-One Loom Is the Best Choice in a Sea of Choices

This loom by Authentic Knitting Board has several competitive advantages.  First and foremost is its versatility, which gives more bang for the buck.  That's closely followed by the company's obvious dedication to educating customers.


Versatile and Classy Design

The All-n-One Loom is versatile and classy.  


Its base is a lovely, finished wood, and its adjustable parts are held together with metal nuts and bolts - sturdy, reliable, durable, and easy-to-replace if lost. The grooved pegs are made of a stiff, ivory plastic. I could hold the loom in one hand while working with the other. I felt, as I was knitting last night, like I was playing a fine instrument.  I felt like I was making something special.

The board is 18" long and came well-packaged in a box that looks quite modern and sophisticated, while still indicating this is a fun, but useful, tool.   The knit hook is included, and it is also made of wood and metal.    The interchangeable 5-peg sliders and spacers are what allow for both knitting in-the-round and double-knit board knitting. The pegs are spaced 3/8" apart, which is what allows for the use of worsted weight yarns.

Although I did have a few concerns about the design when I first looked at the product, once I started to use it, I was no longer concerned.

First, I was concerned it would be difficult to ewrap between the 3/8" spaced pegs. However, I was pleasantly surprised by how easy it really was.  I had no difficulty finding a way to wrap that was easy and speedy: I set the board upright in my lap and wrapped around the pegs with the yarn at the tips of my fingers like I was holding a pencil.  Voila!  And I had no wrist or hand pain!

Also, I did have a concern about the wing nuts used to hold the sliders in place.  I thought I might bump them while using the board, but the wing nuts were no problem at all.

Dedicated to Customers and Dedicated to Educating Customers

Authentic Knitting Board stands behind a 100% satisfaction guarantee, and one look at their Web site makes it easy to see they have a serious and heartfelt dedication to educating customers.


This All-n-One kit comes with a very thorough, easy to understand instruction booklet and 4 projects to get a knitter started.  The images in the booklet are clear and crisp, making them easy to follow and understand.  The instructions are also written in clear, concise language, which makes it easy for beginners like me to understand.

Furthermore, the Authentic Knitting Board Web site offers video tutorials, free patterns, and how-to basics.  


They even have a Yahoo! discussion group!  The FAQ page helps customers decide which board to buy without any hard sell language, wishy-washy language, or upselling. They are as proud of their basic loom knitting kit as their  scarf size Tadpole Kit knitting board product as they are their 38" afghan knitting board.

What I found most heartwarming on their Web site, however, is this particular piece of their mission statement:

"Our mission also involves assisting women's relief groups with knitting boards and personal instruction.  Our goal is to see these individuals grow in self belief that they, too, can create beautiful, useful, warm garments for themselves, their families, and as a means to supplement their family income."

How could anyone ever doubt this is a company worth supporting?

An A+ Product from an A+ Company

All in all, the All-in-One is an A+ product from an A+ company.  The versatility of the board, its classy design, and the company's dedication to educating and supporting their customers makes me feel as warm and fuzzy as a new afghan.  The All-n-One Knitting Loom would make an excellent gift for any crafter this holiday season.  


Want to read more about fiber arts and arts and crafts?  Try

Which Weaving Loom is Best for Beginners?
How to use Beautiful Buttons
Arts and Crafts and Healing


Copyright Amy Lynn Hess.  Please contact the author for permission to republish.


Thursday, October 16, 2014

Lulu versus Amazon: Which is the Better Publishing Platform?

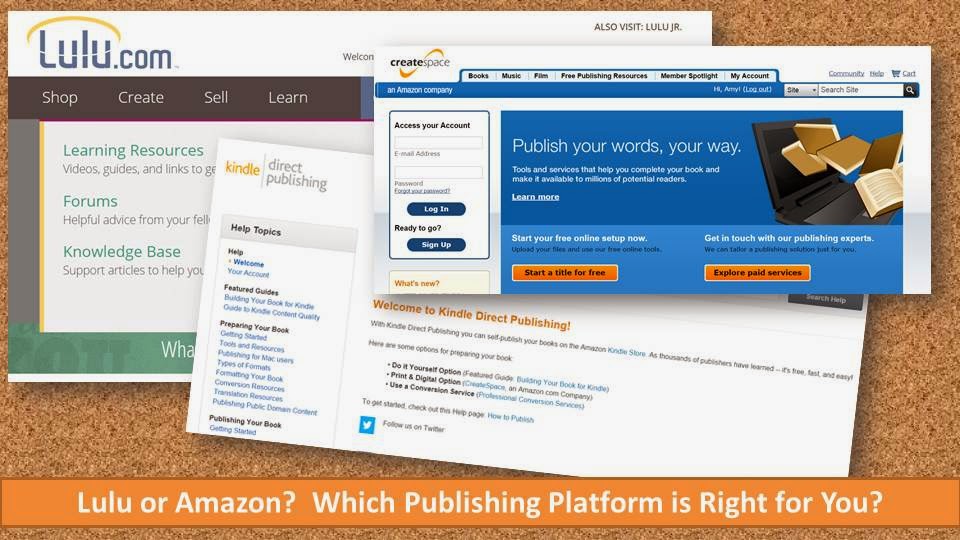
The homepages for Amazon KDP, Lulu, and CreateSpace
Customers and Costs are Two Major Considerations

Are you considering publishing using either Amazon or Lulu?  There are benefits and drawbacks to each.


Within the last year, I have published both print books and electronic books using both Amazon and Lulu. There are drawbacks and benefits when using either of these two publishing platforms, but I do prefer Amazon's CreateSpace and Kindle Direct Publishing over Lulu's publishing platform.

Although other publishers may hold opposing views, here's the skinny according to Amy Lynn.

The Pros and Cons of Publishing Using Amazon's CreateSpace and Kindle Direct Publishing 


The Benefits

The three most important reasons why I prefer Amazon to Lulu are all related to Amazon's infallible ability to sell sell sell.

First and foremost, Amazon's  pièce de résistance is its number of shoppers and the level of trust those shoppers have when placing online orders.  I, myself, lose hours on Amazon some nights just by browsing arts and crafts supplies.

Also, for publishers like me, there are some ways to capitalize on those numbers and that trust while at the same time benefiting the reader - a win win!  For example, I can set Kindle Countdown deals, free giveaway days, Kindle Matchbook pricing, or Lending Library settings for each of my books, helping me promote and gain reviews. Furthermore, Amazon will also, at times, reduce the price of my print book while I make the same royalty via my CreateSpace agreement and settings.

Furthermore, Amazon's ability to sell sell sell to readers means they do not try to hard sell me on their packaged publishing services. I know there is help available,  but their system is easy enough to navigate, and their rules and formatting guidelines are easy enough to follow, that I do not need to purchase those services.  Did I mention they do not push their professional services to me every time I access my account?

The Drawbacks

As with all good things, however, come a few bad.  The two worst things I have to say about publishing with Amazon are to do with revenue and bookkeeping.

Amazon Kindle Direct and CreateSpace do not allow for multiple payees to be set in their payment systems.  If two or more people collaborate on a book, only one of those people will receive payment from Amazon.  That places the burden of the split on one person, most likely a person who has little to no experience with bookkeeping.  Come tax time, that could be a nightmare.

It's also very difficult to project Kindle Unlimited and Kindle Owners Lending Library revenue. Because it is a sliding relative scale and pool from which writers are paid, no one really knows what to expect month to month.  Part of good business is being able to project pipeline income, but with this particular system it is nearly impossible.

The Pros and Cons of Publishing Using the Lulu Platform 


The Benefits

So, why, you may be asking, did I publish through Lulu if I appreciate Amazon's ability to sell sell sell?

I have one answer only: With Lulu, I can set multiple payees per book with adjustable revenue percentages per person.

In the past I have never truly made profit (or even regained the capital) on published poetry chapbooks.  Thus, there wasn't any revenue or royalty to send poets. With Lulu, however, I can offer a revenue split with no capital lost to printing costs.  The poet can order and sell as many copies as he wants at any price.  In the meantime, the book is also available online to order as an eBook or as a hardcopy. Again, it's a win win!


The Drawbacks

Unfortunately, although the multiple payee system is a BIG benefit, it is really the only benefit to using Lulu instead of Amazon.

Lulu's Web site is more difficult to navigate than either the Amazon Kindle Direct Publishing Web site or the CreateSpace Web site.  Part of the reason it's difficult to navigate is the abundance of ads for their publishing services that are inserted into the publication process fields or as major sections on each page.  It's a very hard sell and could confuse self publishers into thinking these are services they must use instead of services they have the option to use.

Even more of a drawback are Lulu's costs per book.  Their print books cost more to order than CreateSpace books.  For example, to order my own 30-page book from Lulu costs around $11.00.  To order my 150-page book from CreateSpace costs $6.00.  Both books have full color interior pages. That discrepancy is glossed over in Lulu's sales pitch that writers will "make more" on Lulu.  What they do not mention is that the reader also has to pay a lot more, thereby lessening sales.

In the end, I would much prefer to use Amazon's publishing platforms over Lulu's publishing platform.  Even though Lulu's platform allows better management of payments to collaborative teams, Amazon offers many more opportunities for sales and lending than Lulu can offer with sales alone.


Learn more about self publishing your poetry!  


Sign up for my discounted online course on Udemy, Publish Your Own Poetry Chapbook,  with over 10 lectures and 1.5 hours of content with lifetime access!

By the end of the course, students will know how to plan, produce, and distribute a poetry chapbook.


Copyright Amy Lynn Hess.  Please contact the author for permission to republish.

Using ChatGPT for Essays in English Composition Classes

The best essays are written by people for people. "Corona Typewriter" image courtesy of the author ChatGPT and other AI language g...