Welcome!

Do you have APA formatting questions? Thesis statements got you down? Need to study grammar? Need some help with critical thinking? Having trouble with literary analysis or research? Want to take a look at some example essays? Well, I probably have a post here somewhere that can help you. Please use "Search This Blog," the "Labels," or my "Blog Archive" to help you find what you need. Have questions about what you find? Please feel free to comment or ask questions. I do moderate comments, and I try to respond to all topical questions and comments in a timely manner.
Showing posts with label Writing Recipes and How To's. Show all posts

Wednesday, June 10, 2020

Make a Jar of Dill Pickles

Ingredients for making pickles: pickling salt, white vinegar, cucumbers, dill, and garlic
As hobby gardeners, we don't often grow or harvest enough fruits and vegetables to store excess long term. Fruits like strawberries and blueberries are frozen to be used within a month or two, and vegetables like snow peas, peppers, green onions, okra, cucumbers, asparagus, tomatoes, and squash are eaten in season, within a week or two - or gifted to family and friends.  

On those rare occasions when we have a few more veggies than we can eat in salads or stir fries, I make quick pickles, often just one jar at a time. 

I most often pickle cucumbers, but we also enjoy pickled okra and pickled asparagus. This same ratio of salt, vinegar, and water can be used to make brine for any of those vegetables.

Ingredients for a Quart Jar of Pickles


  • 1/4 C pickling salt
  • 1 cup white vinegar
  • 2 cups water
  • 6 cloves garlic
  • 6 sprigs dill

Quick Pickle-Making Supplies

Jar lifters and 4 cup measuring bowl with handle and spout
Jar Lifters and Measuring Bowl
  • 4 cup or larger glass measuring bowl with pour spout
  • 1/4 cup measuring cup
  • 1 quart jar and lid with ring
  • Tall kettle (taller than your quart jar)
  • Hot pads and oven mitts
  • Knife

Optional Supplies

  • Cutting board
  • Canning jar lifter
  • Tongs
  • A second jar for excess brine or pickles

How to Make a Jar (or Two) of Pickles

Prepare, Pack, and Process


1. Sanitize your jars and lids. I boil mine in the same 12 quart kettle I'll use to process the pickles. Once they boil for 3 minutes, I remove them with my jar lifter and tongs, and I leave the hot water in the kettle on the stove.

Pickles packed in a quart  and jelly jar
Pack pickles and add brine, leaving 1/2" space.
2. While the jars are boiling, prepare the cucumbers, dill, and garlic by rinsing, trimming the ends, and removing the skin of the garlic.

3. Next, prepare the brine: I add 1/4 cup pickling salt, 2 cups water, and 1 cup white vinegar to the 4 cup measuring bowl. I also add my garlic and dill to the brine. I boil the brine for 5 minutes and return it to the measuring cup. The brine can also be boiled in the microwave.

4. Once the jars are ready, pack the pickles into the jar(s), leaving 1/2 - 1 inch of space at the top. Because I always have a little extra brine, I can sometimes make a jar of sliced pickles or baby dills, too!  I add 4 sprigs of the boiled dill and 4 garlic cloves to the large jar, and I add 2 each to the small jar. 

5. Once the jars are full, loosely add the lids and rings.  
Loosen lids before placing in water to boil
Loosen lids and boil for 10 - 15 minutes.

6. Place the jar(s) right-side up  into the tall kettle and add more water as necessary. Bring to a boil and process 10 - 15 minutes. 
7. Remove the jars using the jar lifter (or hot pads), let them cool, and seal them tightly. 


Remember that these instructions are not for pickles that will be stored long-term, so there's no sealing wax or rubber rings used. These are to be used within a month or two.

Additionally, always follow all food safety and supply-specific instructions and recommendations for a healthy, happy, pickle-making experience.


Want to read more recipes and how-to's? Try


Copyright Amy Lynn Hess. Please contact the author for permission to republish.


Wednesday, April 8, 2020

Three Ways to "Un-Altoids" a Tin: Hammering, Decoupage, and Polymer Clay

Altered Altoids Tins

Removing "Altoids" from an Altoids Tin

When altering an Altoids tin, makers generally begin by thinking about the inside, what the tin will hold, or its new purpose. Once its purpose is determined, however, the maker should also consider the outside of the tin; specifically, how the outside will give hints about that purpose or have some meaningful connection to its inside. Because the inside assuredly will no longer hold Altoids mints, most makers do not want to see "Altoids" on the lid or ingredients and nutritional information on the bottom unless it's part of a meaningful artistic juxtaposition, a clever camouflage, or when the inside is meant to be hidden or a surprise.


Remove the paint easily with flame and steel wool.


Removing the Exterior Paint and Labeling

The first step in removing "Altoids" is to remove the paint and labeling. For each of these examples, I removed the paint by setting the tins in hot coals in the fire pit for about 20 minutes, removing them with tongs, letting them cool, and scrubbing them with steel wool.


Polymer Clay, Hand-Hammering, and Decoupage Covered Tins

Covering a Tin with Polymer Clay


If a maker has polymer clay on hand, covering the tin is fairly simple and makes little to no mess. The polymer clay is rolled to 1/8" thickness and rolled onto the lid and its edges. This thickness completely hides the embossed "Altoids" lid.

Excess polymer clay can be cut away with a razor-blade before hardening in the oven, and it can be sanded after hardening and cooling. Some polymer clays will take paint or stain.

Additionally, as long as the maker carefully trims around the hinges, the tin will still open and close when the process is completed. The tin in the image will be used for seed storage, as the lid now clearly indicates, so it's important that it opens.

Hand-Hammered Altoids Tin

Another straightforward method for removing the embossed "Altoids" name from the lid of the tin is for the maker to hammer it out using a ball peen hammer. Either a 4 oz or an 8 oz hammer will do, as long as the peen is well-rounded. A peen with an edge or point will work, but it's much more difficult to make sure the tin isn't damaged.

The maker should remove the lid of the tin, and place newspaper or rags underneath it before hammering. Working on the center, first, then working to the edges will create a rounded lid. It takes several strikes to hammer out the lid, but occasionally placing the lid back onto the tin will ensure it doesn't get hammered out of shape. 

The tin in the image was painted with a metallic copper paint and lightly distressed after hammering. "Altoids" is still slightly visible, but the obviously distressed aesthetic allows for it. 

Decoupage Altoids Tin

Lastly, Altoids tins can be covered using decoupage. This is by far the messiest option and requires more supplies than either the polymer clay or hand-hammering methods. This method also requires an artistic eye. 

When done well, decoupage covers the lid entirely and helps establish a mood or style for whatever appears on the inside of the tin. Paper, cloth, leaves, and other thin ephemera make excellent coverings. 

In this case, a glossy dimensional resin was used over black cotton cloth and household findings. The tin will be used as a antiqued, small memorial shrine, so the items are quite personalized.

Using polymer clay, hand-hammering, or using decoupage techniques are all methods for hiding or removing the Altoids label from the lid of a tin before reusing. Each method has its pros and cons, from level of mess to level of coverage, but each also allows for the tin to become a very personal expression. Each method allows for the creation of a meaningful aesthetic.

Want to read more about Arts and Crafts? Try

Punch Needle Embroidery Supplies for Beginners
Point of View and Emotion
Crochet Christmas Tree Ornaments


Copyright Amy Lynn Hess. Please contact the author for permission to republish.


Monday, December 23, 2019

Small Batch Microwave Peanut Brittle

Crispy, thin, bubbly peanut brittle in 20 minutes!

My favorite game when I was small was Candy Land. More than the gameplay, I was mostly enamored by the idea of the Peanut Brittle Swamp, and I always imagined what it would be like to be bogged down in a swamp of my favorite Christmas candy. 


That daydream sticks with me even forty years later, but I've never made my own peanut brittle. I thought it was too complicated and required kitchen stuff I don't have. I was wrong, however, and it doesn't!  After perusing Pinterest for a few hours last week, I came across a couple of pins that were all  a variation on a theme: microwave peanut brittle. After a couple of failed batches (too much baking soda will make you burp like you've shotgunned a Pepsi) and minor adjustments (too much time in the microwave will burn the batch), I was able to make a small batch of crispy, thin, bubbly peanut brittle in about 20 minutes, start to finish. 

Ingredients for Small Batch Microwave Peanut Brittle 


1/2 cup granulated sugar
1/4 cup corn syrup
1/2 cup roasted peanuts
1/2 tablespoon butter
1 teaspoon vanilla
1 teaspoon baking soda
cooking spray

It's a good idea to make your peanut brittle in a glass measuring cup/bowl with a handle (mine is a 4 cup size), and to use a silicone spoon or spatula and a silicone mat to line your cookie sheet. I picked up my silicone mat at Kroger for just under $8.00, and so far it's worth it! Also note that my microwave is  1000 watts (there's a sticker inside the door), so if yours is less powerful, your brittle may need more cook time.

Directions for Small Batch Microwave Peanut Brittle


1. Place the silicone mat inside a cookie sheet and spray it with cooking spray. Set aside.

2. Mix the 1/2 C granulated sugar and 1/4 C corn syrup in your glass bowl or measuring bowl. Place in microwave and heat for 3 minutes.

3. Remove the hot sugar syrup from the microwave promptly and stir in the 1/2 C roasted peanuts. Place in microwave and heat for 2 minutes.

4. Remove the hot sugar syrup from the microwave promptly and stir in the 1/2 T of butter and the 1/2 t of vanilla. Place in microwave and heat for 1 minute.

5. Remove the hot sugar syrup from the microwave promptly and add the 1 t baking soda. Stir it well. It will grow. Stir a little more. Place in microwave and heat for 30 seconds.

6. Remove from microwave promptly, and pour it onto the silicone mat. Leave until brittle, or place in the freezer until brittle.

Cleaning up After Making Peanut Brittle

Silicone utensils and a silicone mat make cleanup easy
Peanut brittle makes a sticky mess, but it can be cleaned up easily by freezing your utensils and snapping off the sugar or by using really hot water and dish soap. I used hot water and dish soap to get it off my hot pads, apron, slippers, and rug, too. I may have  been trying to recreate the Peanut Brittle Swamp - subconsciously, of course!

Because this is fairly simple and inexpensive, if you (like me) need to make adjustments to cooking times or ingredients to make your perfect brittle, feel free to comment and share your experiences. Merry Christmas!


Want to read more for the holidays? Try


Grief and Healing: Using the Nice Dishes
Crochet Christmas Tree Ornaments
It's Time to Count My Blessings (Instead of Sheep)


Copyright Amy Lynn Hess. Please contact the author for permission to republish.


Monday, July 15, 2019

Our Favorite Non-Dairy, Gluten-Free Noodle Bowl Recipe

This healthy noodle bowl is gluten free and dairy free, and features purple cabbage and avacado
My Favorite Rice Noodle Recipe
Gluten-Free, Dairy-Free, and No Sugar Added

Interested in a gluten-free, dairy-free, no sugar added, super-duper, complete  meal in a bowl? 


I whipped up this noodle bowl recipe one day when I needed to use up some odds and ends we had in the house, mostly the precarious avocado on the countertop and some herbs getting out of control in the garden. It's become one of our favorite go-to's for supper, especially when we're in a hurry . . . and with my need to avoid dairy, gluten, and sugar, establishing a go-to meal is something spectacular.

It's also easily adaptable: I sometimes add fresh Polish kielbasa, kale, or cilantro and parsley in addition to the other herbs or instead of the other herbs. It's also just as delicious with lemon instead of lime, or with vegetable broth instead of chicken broth. If need be, eliminate the coconut milk for a clear broth, or use low sodium ingredients. The trick is to do what's best for you with no awful ramifications or digestive problems. What follows is what works best for us, including the approximate nutritional information provided by entering the recipe into the MyFitnessPal nutritional calculator.

Ingredients 

Our Favorite Noodle Bowl
Beautiful purple broth, with Polish kielbasa
4 oz (2 servings) Sempio Rice Noodles, or your favorites
3 Cups chicken broth
1/2 can coconut milk
2 cloves pressed garlic
1 tbsp grated or sliced ginger
1 tsp Freeze-Dried Chives or 1 tbsp fresh chives or green onions
1 medium avocado covered in lime juice
1 medium lemon (juiced)
1 can sliced water chestnuts
2 cups rough chopped red cabbage
1-2 sliced carrots
Salt to taste

*Optional
1/2 lb fresh Polish kielbasa, boneless rib meat, or diced dark meat chicken 
2 tbsp fresh thyme
2 tbsp fresh basil

Instructions

You will need 2 6-8 cup kettles, a can opener, a cutting board, colander, and your favorite chopping and slicing knives, stirring spoons, large soup bowls and forks, and a soup ladle.

  1. Clean and chop the veggies (but not the avocado, yet), and mince, slice, press, or grate your herbs. Juice your lemon and lime.
  2. In the first kettle add broth, coconut milk, herbs, water chestnuts, lemon juice, purple cabbage, and carrots. Bring to a boil, then simmer for 5 minutes. Salt to taste. Ladle the soup into large soup bowls. There should be enough for 2 servings (and maybe a bit more).
  3. In the second kettle, bring 4 cups of water to a boil for the rice noodles. Add the rice noodles to the water and boil for 4 minutes. Drain the rice noodles and add them to the noodle bowls. Spoon some of the broth over the noodles to prevent them from sticking. 
  4. Lastly, wash, peel and slice your avocado, coating with lime juice, and adding half to each bowl. 
*If adding meat, brown it and simmer in the soup for 45 minutes or cook per the packaging instructions.

Nutritional Facts

Servings 2
Amount Per Serving:
  • Calories 604
  • Total Fat 29 g 45 % 
    • Saturated Fat 17 g 83 %
    • Monounsaturated Fat 7 g
    • Polyunsaturated Fat 1 g
    • Trans Fat 0 g
  • Cholesterol 0 mg 0 %
  • Sodium 1727 mg 72 %
  • Potassium 941 mg 27 %
  • Total Carbohydrate 77 g 26 %
    • Dietary Fiber 9 g 35 %
    • Sugars 8 g
  • Protein 10 g 21 %
  • Vitamin A 38 %
  • Vitamin C 89 %
  • Calcium 38 %
  • Iron 10 %


* The Percent Daily Values are based on a 2,000 calorie diet, so your values may change depending on your calorie needs. The values here may not be 100% accurate because the recipe has not been professionally evaluated nor been evaluated by the U.S. FDA. If adding the Polish Kielbasa, add a total of 508 calories (254 per serving), 40 g total fat 9 g total carbs 29 g protein.

Want to read more gluten-free, dairy-free recipes? Try

Gluten-free, Dairy-free Peanut Butter Cookies
Mizeria: Gluten-free, Dairy-free Cucumber Salad
What to Eat While Fighting Lyme Disease: Detox Soup


Copyright Amy Lynn Hess. Please contact the author for permission to republish.

Wednesday, May 2, 2018

What to Eat While Fighting Lyme Disease - Detox Soup

Amy's "Detox Soup" Makes a Great Breakfast

One of the hardest parts of my Lyme fight has been eating, both finding things I can make myself eat and finding things that meet my dietary restrictions. I am currently eating only sugar-free, gluten-free and dairy-free in order to help reduce the amount of inflammation in my neck, knees, hips, and digestive system.  


One simple, tasty meal I've been eating for several months for breakfast is what I call my "Detox Soup." It combines several ingredients that seem to help keep inflammation at bay.  Whether or not you need as much help as a Lyme patient might need to stay healthy and keep at fighting weight, the key here is that it is tasty, and I happily eat it almost every day before leaving for work. I get three servings from the recipe. It reheats on the stove in a few minutes and tastes just as great the next day and the next.

Amy's Detox Soup Ingredients and Substitutions


  • 2-3 Cups Chicken Broth, Bone Broth, or Vegetable Broth (I like Swanson's or College Inn chicken broth)
  • 1 Cup Uncooked Royal Select Rice Blend (affiliate link) or Jasmine Rice
  • 1 or 2 Cloves Garlic
  • 1/4 Cup Fresh Cilantro or Fresh Basil Leaves
  • 1 Stalk Celery
  • 1/2 Lemon
  • 1 Tablespoon Coconut Oil or 1/2 Can Coconut Milk for a Creamy Soup

Making Amy's Detox Soup


  1. Add 1.5 cups water to a 4 quart stainless steel pot, bring to boil and add rice, or follow directions for cooking your choice of rice.  
  2. Add pressed or minced garlic and other fresh herbs while the rice is cooking.  
  3. Add sliced celery while the rice is cooking. 
  4. Add coconut oil or coconut milk, stir, and cover.  
  5. Lower heat and simmer for 10 minutes or until the rice has absorbed most of the water.
  6. Once the rice is cooked, add 2-3 cups broth and increase heat to medium or medium high.
  7. Add the juice of 1/2 lemon and zest to taste.
  8. Once the soup boils for 3 minutes, remove from heat and serve or store leftovers in a glass or ceramic bowl.

Nutrition Information

I used the nutritional tool on MyFitnessPal to calculate the approximate values for this soup with my ingredient preferences at 3 servings.


If you need a tasty soup made to meet an elimination diet or dietary restrictions because of  inflammation caused by any number of diseases or conditions, give this soup a try and let me know how it goes! Of course, be sure to speak to your healthcare provider to make sure the ingredients and nutritional values in this recipe meet your needs.  Be healthy and heal well!

Want more recipes?  Try

Mizeria: Dairy Free Cucumber Salad
Easy Cauliflower Soup
Cheesy Kale Salad with Almonds and Blueberries


Monday, August 7, 2017

Lyme Disease and Aromatherapy: Rocky Mountain Trail Essential Oil Blend

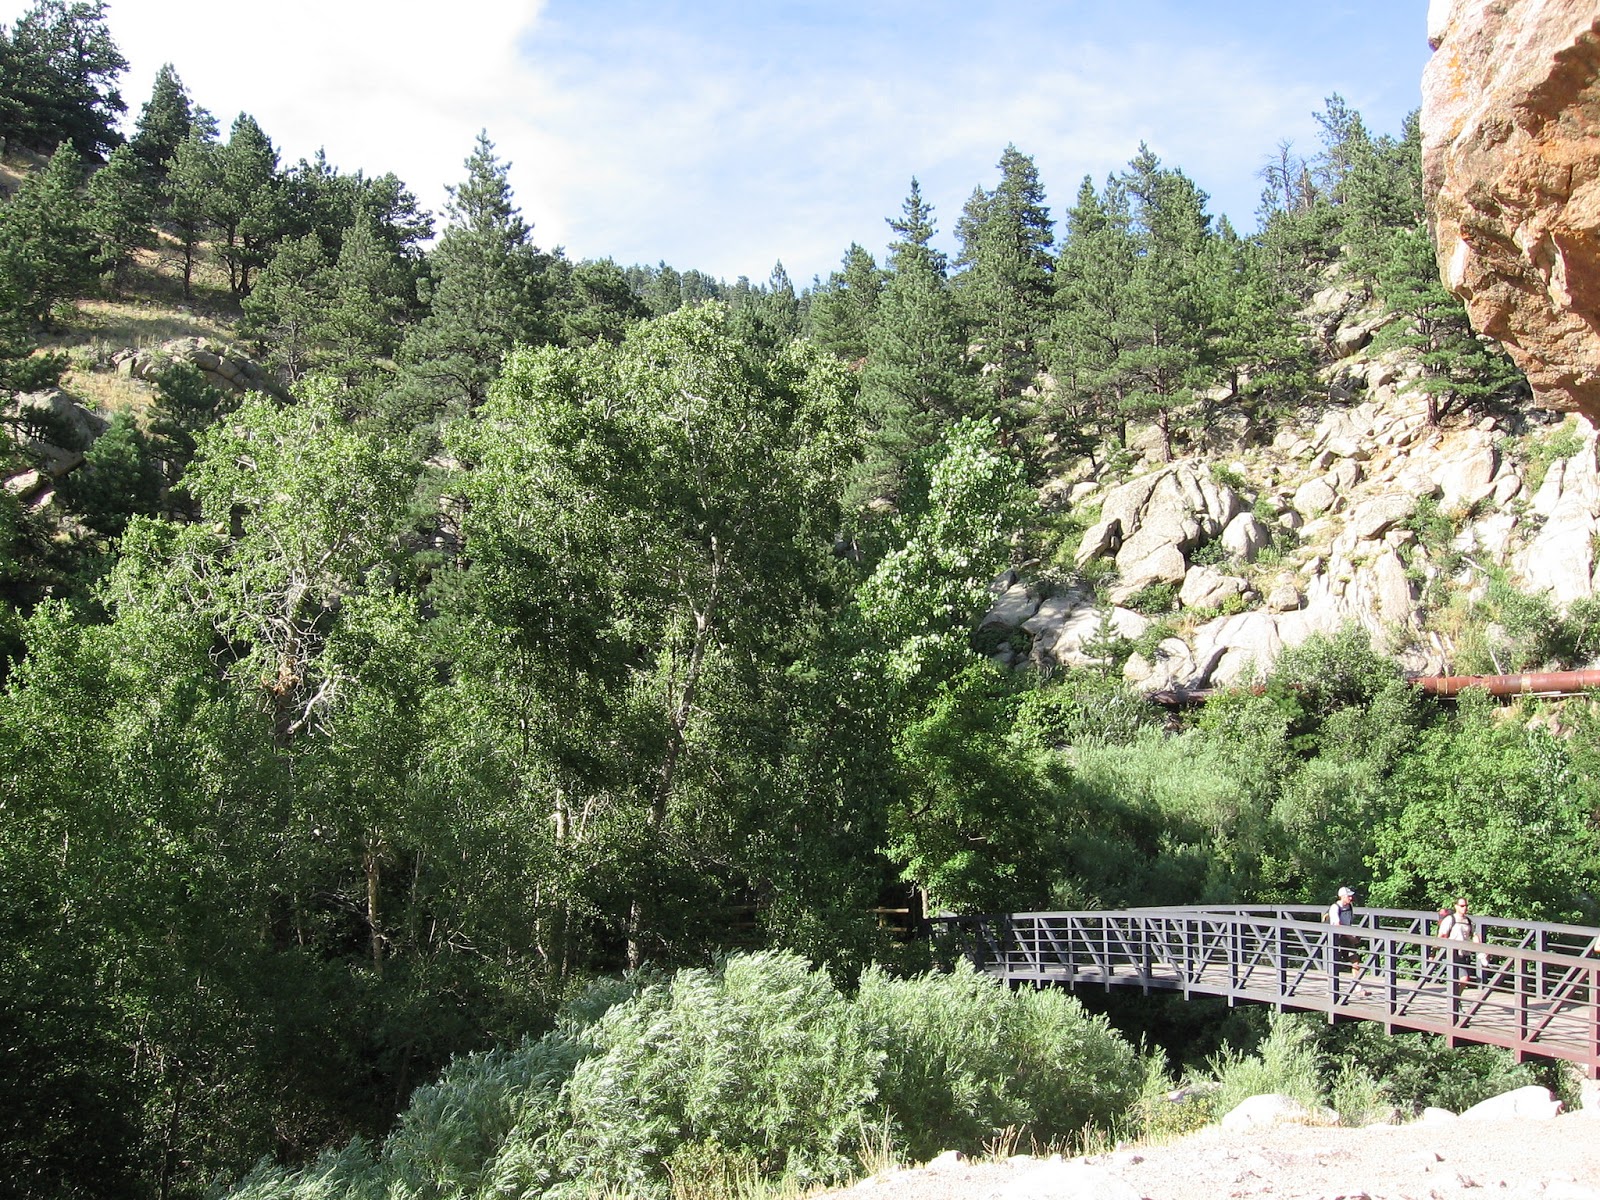
Hiking near Boulder, Colorado

I was recently diagnosed with Lyme Disease.  Part of the effect of the antibiotic treatment includes the release of endotoxins by the microbes as they begin to die: Those microbes and endotoxins, in addition to making me hurt everywhere all the time, cause hormone imbalances that cause severe mood swings.  


Sadness and Frustration 

To be clear, the swings of sadness and frustration I am feeling are probably more to do with my lack of physical energy, which has caused me to be homebound for the last few weeks in a dirty home, as I have not had the time or energy to do much of the cleaning I normally like to do.  The depression, itself, however, goes deeper and causes irrational feelings of hopelessness, anxiety, and worthlessness, or even hours at a time of complete apathy and emotional numbness.  The feelings, or lack of feeling, comes and goes in waves, luckily, so I "snap out of it" as the day goes on and feel like myself in the late afternoon or early evening - before I take another antibiotic, and it starts all over, again.


Fear

Native Cactus near Boulder, Colorado
One thing that is persistent, however, is my fear that I will never again be able to enjoy the outdoors like I once did for fear of being reinfected. Once I take my morning antibiotic, I know that for the next several hours I am going to experience the physical and emotional effects of the microbes and endotoxins, and that my fear is going to grow over the course of the day until my body can catch up on eliminating the toxins causing my reactions. Although there isn't a whole lot more I can do to quickly eradicate the microbes and their toxins, I can combat some of that daily emotional upheaval with aromatherapy via my oil burner. Specifically, I think I have perfected a blend that reminds me of one of my most favorite places in the universe, the wooded mountain trails near Boulder, Colorado.


Aromatherapy Outdoor Blend: Rocky Mountain Trail


I use an oil burner that has been saturated with my own Thieves Blend over the course of several years, which adds a hint of cinnamon and clove to all of my aromatherapy recipes (and helps cleanse the air). If you do not have a Thieves Blend, simply add a one drop each of cinnamon, rosemary, clove, and lemon to this recipe.

5 drops Cedarwood Oil
3 drops Pine Needle
3 drops Eucalyptus
2 drops Jasmine

This particular recipe utilizes all three, top, middle, and base notes for a great balance. Because it is an oil burning recipe only (not meant for skin contact or ingestion), there are few risks for side effects.  It simply helps me relax by reminding me of a place and time that made me happy.

Medical Care 

Boulder, Colorado, 2007
If you are new to aromatherapy, please be sure to research the effects of any oil that's unfamiliar to you - just in case.  Remember to wear gloves, if you aren't using pipettes, to be sure there is no skin contact with any of your aromatherapy oils to prevent irritation.  Of course, you should also talk to your doctor, LLMD, integrated medical practitioner, or herbalsit if you have any questions or concerns about your Lyme treatment symptoms or using aromatherapy, especially if the symptoms seem to be worse than you can handle. Although aromatherapy is a great addition to your care, it is definitely no substitute.


Be well,
Amy


Copyright Amy Lynn Hess.  Please contact the author for permission to republish.

Monday, July 3, 2017

Mizeria: A Dairy Free Cucumber Salad Recipe

Polish Mizeria, Cucumber Salad, Made Gluten and Dairy Free!

Traditionally, mizeria is made with sour cream.  However, it's just as tasty made with the tangy zip of Miracle Whip, now also made as "Gold Standard Recipe" with no high fructose corn syrup! 


That makes my mizeria okay for folks who are gluten free, dairy free, or following a low FODMAP diet!  In other words, thanks to the folks at Kraft who brought back the original Miracle Whip recipe, mizeria is back on my menu!  


Mizeria, or Polish Cucumber Salad


I generally make enough for one or two meals serving one or two people.  That is, I don't make a whole lot at once, otherwise I eat it all at once.  You can double or triple the recipe as you see fit.
  • 1 large or 2 small cucumbers
  • 1 green onion
  • 2 tsp Fresh or dried dill
  • Salt and pepper to taste
  • 2 tbs Miracle Whip Gold Standard Recipe
  • 2 - 3 large radishes

  1. First clean, peel (or don't peel), and thinly slice your cucumber and add it to a mixing bowl.
  2. Clean, peel, and thinly slice your green onion and add it to the cucumber slices.
  3. Add 1 tsp dill, salt and pepper, and Miracle Whip to the mixing bowl.
  4. The fun bit: Wash your hands, then toss your salad until everything is evenly coated with the Miracle Whip. Wash your hands, again.
  5. Serve fresh or chilled with additional dill and radish slices on the side. 

Note: For purists, you can add a bit of vinegar to the recipe, but Miracle Whip already contains a bit of vinegar, so I skip it.

Looking for additional recipes that are easy on the stomach?  Try


Copyright Amy Lynn Hess. Feel free to share, but please contact the author for permission to republish.


Wednesday, January 13, 2016

Easy Cauliflower Soup Recipe

Easy Cauliflower Soup is Perfectly Light and Tasty!

I am a fan of cauliflower.  I like it raw, roasted, steamed, boiled, crisp and crunchy or smooth and creamy.  When I learned I could make it into a soup, I was eager to try it out.  


Ingredients for Easy Cauliflower Soup


  • 1 Head Cauliflower
  • 1 Can Chicken Broth
  • 1 Tablespoon Unsalted Butter
  • 1 Clove Garlic (Minced or Pressed)
  • 1 Cup Skim Milk
  • 2 Stalks Celery
  • Shredded Cheese


Directions 


  • Add butter, chopped cauliflower, pressed or minced garlic, and chicken broth to 3.5-quart or larger dutch oven or soup kettle.
  • Bring to a boil, reduce heat, cover, and simmer for 1 hour, stirring or whisking the soup occasionally to break down the cauliflower.
  • Add the celery, sliced, and simmer for an additional 30 minutes.
  • Add milk and continue to whisk more frequently until the cauliflower reaches your desired consistency.
  • Serve with a nice bit of shredded cheese on top.

Nutritional Information

As given in the instructions listed here, this soup serves 4, and each serving contains 332 calories. This includes 13 grams of fat, 727 milligrams of sodium, 7 grams of fiber,  19 grams of protein, 10 grams of sugar, 200% of your vitamin C for the day, and half of your daily recommended calcium (based on a 2,000 calorie diet).  Swapping salted butter, whole milk, homemade broth, or reducing the cheese will alter the recipe and allow you to suit the soup to your taste.  Happy souping!


Want to Read More Recipes on Gypsy Daughter Essays?  Try


Copyright Amy Lynn Hess. Please contact the author for permission to republish.


Monday, December 14, 2015

Experimenting with Quince Fruit


Half peeled quince fruit
Preparing a Quince 

Until I moved into my new home here in Georgia, I had never heard of quince.  There is a quince tree in my yard, however, and although neither my real estate agent or I could identify the tree, my neighbor could: Apparently, the tree was planted by her father-in-law more than 60 years ago!


Early this fall, I rescued 2 large quince fruits from the critters; bugs, squirrels, and birds. After a little research online, I learned the fruit was completely edible, and I was able to prepare the two quince fruits like an applesauce. The quince sauce I made was definitely a bit grittier and a lot more sour than applesauce (like a green apple), but with ice cream and crumbles on top, I hear it made an excellent dessert cobbler.

Cutting a Quince

These are not the pretty quince slices I saw online.
First and foremost, know that quince are hard; they are really hard.  Cutting the quince was harder than cutting a winter squash.  I attempted to use a chef's knife, but I resorted to something serrated to saw through the fruit.

In all honesty, I wanted to have beautiful slices like some other online recipes show, but it was all I could do to even get the knife through it. I settled for a good peeling and getting as much of the fruit away from the core as I could.

Preparing a Syrup

While I was hacking away at the quince, I was also creating a syrup over low heat.  I used 1/4 cup of sugar and 2 cups of water seasoned with star anise and a cinnamon stick.

Once I added my two hacked-up fruits to the syrup, I brought it all to a boil, lowered the heat and let it simmer for a few hours.  I checked in on it every so often since I wasn't sure how long it would take.  Some of the slices started getting pink and soft within the first 15 minutes, but others took the two hours.

Finishing and Serving

Star Anise and Cinnamon
After I tasted the quince the first time, it took me about 20 seconds to unstick my face from the "pucker" it caused.  Once I unstuck my face, I added 1/2 cup brown sugar and let it cook for another 15 minutes or so.  The brown sugar brought the power of the sour to a reasonable and refreshing level.

I served the quince cold to my family, but my mother-in-law bumped it up a notch by creating a dessert with the container I delivered to them.  From all family reports, preparing the quince sauce with crumbles and ice cream made it a lovely dessert.

And with that,  ooh la la, I see another quince has fallen from the tree . . . .


Copyright Amy Lynn Hess.  Please contact the author for permission to republish.

Wednesday, September 9, 2015

Airlock Lids and Homemade Sauerkraut

Use 1 1/2 Tablespoons of Salt for 1 Medium Head of Cabbage

I recently decided to try making homemade sauerkraut for the first time.  


After reading a bit about the process and making my intentions known, my husband asked if I was going to bury it in the backyard.

Although it is a bit "from the old country" of me to make my own sauerkraut, I didn't need to go that "old country."


Making Sauerkraut


I was able to make safe, delicious, just-the-right-amount sauerkraut using 3-piece airlock fermentation lids (affiliate link) sold by Quality Reliable Products.

I started by

  1. chopping a medium head of cabbage into small bits, 
  2. stirring it by hand in a large mixing bowl with 1 1/2 tablespoons of sea salt until it got juicy, then 
  3. packing it down into 2 large-mouth mason jars using a small jelly jar and a wooden spoon.

Using Fermentation Lids


After that came the super easy part, which did not include burying anything in the backyard.  

The next steps included 
  1. screwing down the airlock lids, 
  2. slowly twisting the airlocks into the holes in the lids, then 
  3. carefully filling the airlocks half full of water so that none of the water got into the jars and lastly, 
  4. fitting the lids onto the airlocks and placing the jars in a safe storage area for about 4 weeks.

More About Sauerkraut


Now, according to this very thorough sauerkraut-making post by Lea from Nourishing Treasures and posted on the Food Renegade blog by 


What to Eat While Fighting Lyme Disease - Detox Soup
Mizeria: Dairy-Free Cucumber Salad

Monday, August 18, 2014

Bell Pepper Soup: An Adaptable Veggie Classic

Images of home made bell pepper soup with ground turkey.
An easy, inexpensive, gluten-free recipe!

This adaptable soup, made with three types of bell peppers, is flavorful, colorful, healthy, and fairly inexpensive.


This bell pepper soup is exceptionally adaptable. It's a great recipe to use whether I'm feeding a large group of big eaters or just cooking for myself. I freeze any leftovers in glass storage containers and pull them out of the freezer for single meals, making it easy to pack lunches or plan for a busy week. After it's reheated, there is no lost flavor.

I can also make this soup a few different ways depending on my budget—either my money budget or my calorie budget. Depending on my guest list, it can be gluten-free, sugar-free, low-sodium or high-fiber. My favorite way is to make this soup by choosing low-fat and low-calorie ingredients because the low-calorie and low-fat ingredients make up for eating it with homemade bread and butter and a big glass of milk!

I've marked here what I've found to be either required or optional ingredients.

Required Ingredients for Bell Pepper Soup

From the fresh produce department


• 3 fresh bell peppers (I like to use one green, one red or orange and one yellow.)
• 1 small bag of baby carrots
• 1 sweet onion


From the canned goods aisle


• 2 -3 cans/jars stewed or diced tomatoes
• 1 large can/box chicken broth


From the meat department


• 1 pound of ground turkey


"Soup it Up" with Optional Ingredients


Yellow bell peppers behind small piles of diced red and green bell peppers.
Make this soup using three kinds of bell peppers.

From the spice rack 


(I add all my spices to the turkey while it's browning.)
• 1 tablespoon ground cumin
• 1 teaspoon fresh garlic
• 1 tablespoon sea salt
• 1 tablespoon mixed, ground peppercorns
• 1 tablespoon chili powder (Surprisingly, adding this is best in the summer when it's hot.)

From the frozen foods aisle


• 1 cup frozen spinach
• 1 cup frozen beans

Homemade or dry ingredients


• 1-2 handfuls of Polish kluski or Hungarian rivilchas (I add these when it's cold outside, but when I add noodles, I have to use more chicken broth. This option is not the low-calorie option.)

Steps for Making Bell Pepper Soup


Carrots, bell peppers, tomatoes, and ground turkey in a chicken broth.
Even after cooking, the soup remains bright and colorful.
1. I use a teeny-tiny bit of olive oil in a 6-quart kettle to prevent my meat from sticking. I brown my turkey, spices and onion in the kettle.

2. As the meat browns, I dice the peppers and add them to the kettle, too. Because I use ground turkey, there is no need to drain the meat when it's cooked all the way through, and I can add the tomatoes, broth, beans, spinach and carrots right into the same kettle. This has to come to a boil, then I lower the heat to simmer for an hour. It takes that long for the baby carrots to get soft—and longer when I use big carrots.

3. During the last 10 minutes, I bring the soup back to a boil to add the kluski or rivilchas. Dry noodles and fresh noodles take the same amount of time to cook, but I've found that fresh noodles actually absorb more broth, so I have a little more broth on hand.

4. When the noodles are soft, I turn off the stove. Before I eat, I let the soup sit on the stove for 20 more minutes to cool—then I eat!


Copyright Amy Lynn Hess. Contact the author to obtain permission for republication.  First published Jul 1, 2011 by Amy Lynn Hess.

Thursday, August 14, 2014

How to Write Recipes

A cookbook lays open in a lovely kitchen and a lemon meringue pie sits finished.

Written recipes are a type of expository writing.  The goal of a recipe writer is to explain to a reader how to prepare a dish.


Minimally, a recipe includes ingredients and step-by-step  instructions.  Sometimes a recipe includes a list of required equipment or skills. In addition to those basics, however, there are many other ways to liven up a recipe.  Sometimes a recipe writer will add nutritional information, a brief history of the dish or ingredients, or add alternative methods or dietary requirement instructions.  As readers, we may take a recipe writer's writing skills for granted as we drool over beautiful photographs of the finished product.  We shouldn't.

In addition to the recipe's content, a recipe writer must also pay special attention to writing conventions.   The grammar and mechanics of writing a recipe are just as important, if not more so, than in any other piece of expository writing.


Measurements and Abbreviations

First, a recipe writer must adhere to a consistent set of measurements and abbreviations.  Can you imagine a new baker reading a recipe and trying to figure out how to combine 4g of baking powder with 1C of flour and 2 ounces of baking soda?  What about .5L of milk?  How about if it said 4 TBS or 4 TBLS or 4 TSPS?  Is 4 tsp the same as 4 TSPS?  And aren't ounces for liquids?  Some fortunate souls might be able to work it out, but others will not.  Therefore, it is essential that a recipe contain measurements and abbreviations consistent with the conventions accepted by the intended audience and consistent within the recipe - not changing willy nilly in the midst of the recipe.

Verb Tense and Order

Second, a recipe writer must use the proper verb tense and explain the cooking steps in such a way that they are easy to follow.  In other words, it's important to clearly tell the reader when tasks and steps should be completed by using a clearly defined step-by-step order.  A new cook might truly appreciate the instructions to preheat an oven while whisking eggs, or to add chopped nuts only moments before placing a bread into the oven. However, if the instruction to preheat the oven appears after the instruction to add chopped nuts, the instruction to add nuts moments before placing the bread into the preheated oven will be for naught.

A recipe will also read more smoothly if verbs are consistent with previous verbs.  It will read even more smoothly if the structure of each step emphasizes the verbs.  For example, each new step can begin with "chop," "dice," "saute," "steam," or "grate."

Vocabulary and Terminology

Third, when writing a recipe, the vocabulary of cooking must be used correctly.  "Saute" and "fry" may seem like the same thing to some cooks, but they really are not.  Likewise, to use the zest of lemon is not the same as using a lemon.  And can you imagine what might happen if you label a recipe gluten-free when it is not, or vegan when it is really vegetarian or pescatarian?  It is essential that the specific language of cooking, all the jargon and vocabulary associated with cooking, be used appropriately.

The main goal of a recipe writer is to help the reader recreate a favorite dish based on the written recipe.  That requires recipe writers pay very close attention to some very specific writing conventions in order to successfully meet that goal.


Copyright Amy Lynn Hess.  Please contact the author for permission to republish.

Tuesday, July 8, 2014

Four Thieves Blend Hand Salve

Image of a lemon, cinnamon, rosemary sprig, and eucalyptus sprig.
It keeps my hands soft and is rumored to ward off the plague!

I recently learned of an essential oil blend called Four Thieves Blend, and I decided to put its use to test in the form of a hand salve.


Four Thieves Blend has a long and varied history, including use by physicians and citizens in England and France during the long history of the plague (Young Living Essential Oils, 2012).  It is rumored that grave robbers during the 15th Century used a blend of herbs and vinegar to protect themselves from the plague-ridden bodies they were robbing.  When caught, the rumor goes, they fessed-up to having used the herbs in order to be given a lighter sentence (Wolansky, 2012; Young Living Essential Oils, 2012).

The Four Thieves Blend Oils

There are several practical applications for this blend in the 21st Century, including cleaning kitchen and bathroom surfaces, scrubbing floors, polishing furniture, warding off illnesses, and making homes smell nice. Whether or not the historical plague-fighting rumors are true, the oils used in the blend, including clove, lemon, cinnamon bark, eucalyptus, and rosemary, have “antiseptic, antiviral, antibacterial, and anti-infectious properties” (Wolansky, 2012).

Although there is a brand name for this blend of essential oils, I chose to create my own blend using the recipe available on the Mountain Rose Blog and essential oils from our local health food store.  Because I am already aware of the warming properties of clove and cinnamon by way of teas and powders, I was interested in taking full advantage of the warming properties of the clove, cinnamon and eucalyptus oils in a new way. I looked for ways to incorporate this blend into a solution for my often cold hands and feet, and after looking through several books and Web sites about herbal properties and the use of essential oils, I decided to create a simple salve to apply to my hands and feet that should warm them when applied.  That the salve might ward off the plague without harsh pharmaceuticals I feel is definitely a bonus.

Making a Hand Salve

My first step was the test my sensitivity to the oils, so I applied one drop each of clove, cinnamon, lemon, rosemary, and eucalyptus to my wrist.  I could feel the skin tingle and warm, but my skin did not turn red or irritated, so I continued with my salve.

In order to create my salve, I used items I had in my home.  I used ¾ cup safflower oil, an oil known for its moisturizing and anti-inflammatory properties, and approximately 1 ounce of paraffin wax.  To the bottoms of each of two small canning jars, I added 15 drops of my homemade Four Thieves Blend, plus an extra 10 drops each of clove, cinnamon, and eucalyptus oils. I melted the paraffin wax with the Safflower oil in a saucepan on the stove, and I slowly spooned it into the small canning jars.  I let the salve cool completely before adding the lids so as to prevent would-be condensation in the jars.

Using the Hand Salve

The salve firmed to a state the consistency of petroleum-jelly, and a little went a long way when applied.  I applied a fingertip amount to my hands, then used what was left on my hands to rub my feet.  I put socks over my feet and went to bed.  The tingling and warming was weaker, of course, than with the undiluted drops I had tested, but I could feel the warmth of the oils. The Safflower oil also lived up to its reputation, and my hands and feet felt exceptionally smooth in the morning.

If you try or have tried various uses and recipes for Four Thieves Blend, please share your own experiences and recipes with me in the comments section below this post.  As a side note, if I were to make another batch, I would probably use coconut oil instead of safflower oil to keep the salve more firm.

Special Note

Please keep in mind that if you choose to try this for yourself, you must follow some safety precautions. When creating my salve, I did heed the safety warnings given by the makers and sellers of the essential oils. First and foremost, these essential oils are not meant to be ingested. Secondly, I played it safe with the salve and did not add too much of any one of the essential oils because some people have sensitivity to certain oils. I will test the salve and strengthen or weaken it as per my family’s needs.  Even though my method was more experimental than professional, I took the appropriate measure to remain safe in the kitchen.

Additionally, please consult a doctor for any serious medical condition.  I do not recommend essential oils in lieu of proper medical care.

References


  • Young Living Essential Oils. (2012). Four Thieves Vinegar: Evolution of a Medieval Medicine. Retrieved from http://www.secretofthieves.com/four-thieves-vinegar.cfm
  • Wolansky, I. (2012). Recipe: Four Thieves Oil. The Mountain Rose Blog Daily Herbal Musings. Retrieved from http://mountainroseblog.com/thieves-oil/


Copyright Amy Lynn Hess. Contact the author to obtain permission for republication.

Sunday, June 29, 2014

Crochet Some Slippers!

A bright blue crochet slipper with stitch direction arrows.
Crochet this slipper by following the stitch direction arrows.

Everyone gets cold feet. When there's a nip in the air, nip cold feet in the bud!


Crochet Slippers Pattern

This is a crochet pattern for the average lady's size slipper, American sizes 7 - 9, UK sizes 5 - 7, or European sizes 38 - 41.  I adapted this pattern from some other patterns I have seen online that require sewing together either the heel or toe of the slipper.  Instead, the body of my adapted slipper is made in one piece, with no need to sew or bind off until the end.

To create this slipper I used a size "G-6" 4 mm hook with a worsted medium acrylic yarn.  I have approximately 4.5 stitches per inch.


Required Skills


  • Chain (ch)
  • American single crochet (sc)
  • Slip stitch (sl st)
  • Increasing the single crochet
  • Decreasing the single crochet
  • Turning
  • Working in the round (rnd)


Begin with the Toe

The toe of the slipper will be worked in the round, with a slight increase nearest the toes.


  • Foundation Rnd: Ch 10.  Sc in 2nd ch from hook, sc in next 7 sts, 3 sc in last ch. Do not turn. Rotate work 180 degrees. Sc in bottom loop of next 7, 2 sc in bottom loop of last, sl st to beg sc to join rnd -- 20 sts total.
  • Rnd 1: Ch 1 (counts as 1st sc), sc in same st, sc in next 7, 2 sc in next st, sc in next st, 2 sc in next st, sc in next 7, 2 sc in next st, sc in last st, sl st to beg ch to join rnd -- 24 sts total.
  • Rnd 2: Ch 1 (counts as 1st sc), sc in same st, sc in next 9, 2 sc in next st, 1 sc in next st, 2 sc in next st, sc in next 9, 2 sc in next st, 1 sc in last st, sl st to beg ch to join rnd -- 28 sts total.
  • Rnd 3: Ch 1 (counts as 1st sc), sc in same st, sc in next 11, 2 sc in next st, 1 sc in next st, 2 sc in next st, sc in next 11, 2 sc in next st, 1 sc in last st, sl st to beg ch to join rnd -- 32 sts total.
  • These crochet slippers are made as one piece.
    No extra sewing!
  • Rnd 4: Ch 1 (counts as 1st sc), sc in each st around, sl st to beg ch to end -- 32 sts total. Repeat Rnd 4 until the piece measures 4 - 5" from toe, depending on your preference.


Working the Side Quarters

You will now begin working flat rows to create the side quarters of the slipper.


  • Row 1: Do not ch. Sc in next 4 sts, turn.
  • Row 2: Ch 1, sc in next 24 sts, turn.  Repeat Row 2, crocheting back and forth, until the sole of the slipper measures between 8 - 10 inches, depending on the desired length.


Creating the Heel

Once your slipper reaches the desired length, you must finish the slipper by creating the heel.  You will be creating a circle that grows smaller with each new round.  Begin at the end of the last row.


  • Row 1: Do not turn.  Ch 8. Sl in st of the opposite side to create a rnd.
  • Row 2: You may now turn if you have crocheted on the "wrong side" or inside of the pattern.  You should work on the outside of the slipper.  Ch 1.  Sc in each st of the round, including the new chain. Sl st to beg ch to end.
  • Row 3: Ch1. Sc in next st.  Decrease by skipping a st.  Sc in next 2 sts.  Repeat until you end the round.  Sl st to beg ch to end.
  • Row 4: Ch1. Sc in next st.  Decrease by skipping a st.  Sc in next 2 sts.  Repeat until you end the round.  Sl st to beg ch to end.
  • Row 5: Ch1. Sc in next st.  Decrease by skipping a st.  Sc in next 2 sts.  Repeat until you end the round.  Sl st to beg ch to end.
  • Row 6: Do not ch.  Sl st across the remainder of the sts and bind off.


Slipper Edging

Join the yarn the back of the heel to create an edging.


  • Rnd 1: Work sc evenly around entire ankle opening as an edging. Use the formula of 4 - 5 sts per inch to help you space your sts.
  • To finish: Be creative! Choose an edging that is attractive to you: Change colors, perhaps add a rnd of double crochet and weave in a ribbon, or create a tall ankle and fold it over.  Add buttons, flowers, or bows.  However you finish them, make them distinctly yours.

Want to learn more about crochet?  

This lush afghan is colorful and easy enough for any beginner to create.

Try my complete online course, "Crochet for Stress Relief" at Udemy.com.   Once you sign up, you have lifetime access.  Learn at your own pace; there's no hurry.


Copyright Amy Lynn Hess. Contact the author to obtain permission for republication

Monday, June 16, 2014

Cheesy Kale Salad with Blueberries and Almonds

Parmesan cheese sprinkled on a lightly warmed kale and served with almonds and blueberries.
Cheesy Kale Salad with Blueberries and Almonds

What kind of salad do I serve at Chez Moi when we haven't been grocery shopping in a while? Leftover salad, of course!  


I took a little bit of "this" and a little bit of "that" from our weekly leftovers, and voila:  I came up with a tasty salad!  Blueberries from pancakes on Sunday, kale from the soup on Monday, and grated Parmesan cheese from the spaghetti on Tuesday . . . . That's how this wonderful concoction came to be, and I'm really glad  I thought of it because it was a hit!

Ingredients

There are 6 ingredients in this salad, and none are difficult to come by.  As I said, I had all of these in my fridge as leftovers or staples.


  •  2 Cups Chopped Kale
  • 1/2 Cup Fresh Blueberries
  • 1/4 Cup Raw Almonds
  • 3 Tablespoons Parmesan Cheese
  • 3 Tablespoons Coconut Oil
  • 1 Tablespoon Apple Cider Vinegar


Warming the Kale & Presenting the Salad

  1. Slice your kale leaves from the spines.  Chop your kale into pieces to suit your taste.   
  2. Toss the chopped kale and almonds in coconut oil and apple cider vinegar.   I placed mine in a large mixing bowl, covered the bowl with a lid, and shook it all up a bit.  The idea is to make sure the kale is evenly coated with the oil and vinegar.
  3. Place the kale and almonds onto a baking sheet, and put the baking sheet on the center rack in the oven at 350 degrees for 5 - 10 minutes to warm it or crisp the edges, depending on your preference.  If using a toaster oven, shorten the time and watch it closely because the kale will be much closer to the heating element in a toaster oven.  
  4. Remove the baking sheet from oven and, while it's warm, sprinkle the kale with the grated Parmesan cheese . 
  5. Place the salad in a serving dish or dishes,  and add the blueberries on the side for a pretty presentation.


Nutrition Information

I used the handy MyFitnessPal recipe calculator to compile a few brief nutritional facts about this salad.  This salad, divided evenly between two people, is 354 Calories per person and contains 140% the recommended daily allowance (RDA) of Vitamin C.  So, not only is this salad easy, but it's not too bad for you, either!

Hopefully, I'll have all of these leftovers in my fridge, again, in the near future.  We can't wait to have this with dinner, again!


Copyright Amy Lynn Hess.  Please contact the author for permission to republish.

Wednesday, May 28, 2014

Gluten Free and Dairy Free Peanut Butter Cookies

Five little peanut butter cookies waiting to be eaten.
Homemade Peanut Butter Cookies
Image by Sarah B.

Want to learn how to make a dozen gluten and dairy-free peanut butter cookies? No problem!  This recipe calls for only four ingredients, and you probably have them in your cupboard! 


A few nights ago we had company.  We took our guests to dinner, and we all returned to our apartment to chat and catch up.  We had been satisfied with dinner at the restaurant, so we had not ordered dessert.  Once we got settled into our conversation, however, we were all craving something sweet. I checked the cupboards, and they were bare of anything I could think to make, but one of my guests came to my rescue. Together we threw together some peanut butter cookies – both dairy and gluten free!

Ingredients for Throw-Together Peanut Butter Cookies

  • 1 cup salted peanut butter
  • 1 egg
  • 1 cup granulated sugar (to mix)
  • 1/2 cup granulated sugar (to roll)
  • 1 tsp baking powder


Mixing Instructions

  1. Preheat your oven to 350 degrees.
  2. Set aside your ½ cup granulated sugar.
  3. Using a stiff spatula or spoon, mix the peanut butter with the egg.
  4. Whisk the 1 cup sugar and baking powder together.
  5. Stir the dry ingredients (sugar and baking powder) into the peanut butter and egg.
  6. Sprinkle the ½ cup sugar onto a small, flat plate.
  7. Roll a tablespoon of your peanut butter mixture into the sugar on your flat plate.
  8. Place the sugar-coated drop onto an ungreased cookie sheet. Do not flatten.


Baking the Cookies

  • Bake the cookies for 10 minutes, then flatten with a fork, cross-hatching the tine pattern.
  • Bake 5 more minutes.
  • Remove the cookie sheet from the oven and let stand until stiff.


Statistics

  • Approximate Prep Time: 15 minutes
  • Approximate Bake and Cool Time: 25 minutes
  • Approximate Time Until Completely Eaten by Four Adults Who Know Better: 20 minutes

Enjoy these cookies!  Hopefully, you have what you need in your cupboard.  Give them a shot, and let me know what you think in the comments section.


Copyright Amy Lynn Hess. Contact the author to obtain permission for republication.

Using ChatGPT for Essays in English Composition Classes

The best essays are written by people for people. "Corona Typewriter" image courtesy of the author ChatGPT and other AI language g...